Monday, November 30, 2009

Disaster Baking with Cannoli

Prior to my first Daring Baker's challenge, I didn't have a strong
opinion on cannoli. I would have to say that has changed in the last month.

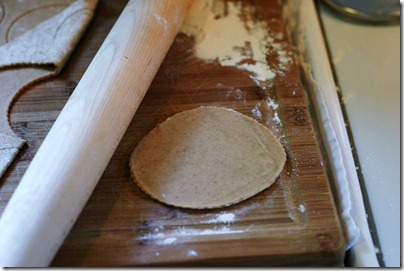
Due to a crazy month, I put the challenge off until this past weekend. As the husband was off watching football at a friend's house, I prepped the dough, let it rest in the fridge, then rolled the dough out. Following the instructions and information posted by lisamichele, I rolled the dough to the thickness of 1/16th of an inch.

IMG_5782

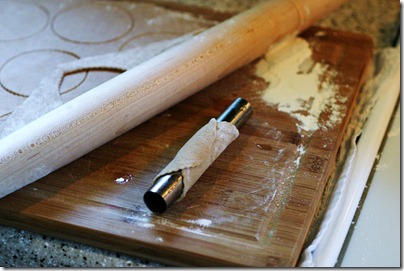
Using a 3 1/2 inch circle cookie cutter, I cut circles out of the dough. I used standard cannoli forms, 6 inches long, greased them with extra vegetable oil, and then rolled the dough around the forms. 

IMG_5784

After cutting the dough out, I rolled the circles a little thinner, just slightly.

IMG_5785

I used standard cannoli forms, 6 inches long, greased them with extra vegetable oil, and then rolled the dough around the forms. 

IMG_5787

The directions said to pour enough oil in a sturdy pot to have oil 3
inches deep. What I later found out was from the hubby was that the large, heavy-bottomed soup pot was not the appropriate pot to fry cannoli. Maybe if I had used a more appropriate pot, my Saturday might have ended better.  So, with such a large pot, I used about 4 1/2 quarts of oil to get the 3 inches, instead of the suggested 2 quarts.

As I started to fry the cannoli, I quickly realized they were frying
super fast. So the first couple cannoli were more of a dark golden
than a nice light gold color. I was getting the hang of it, 7 done and
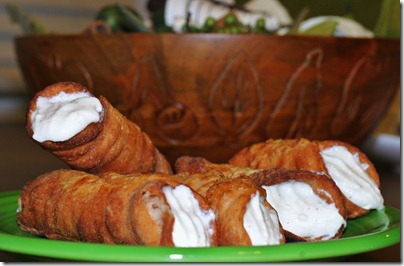
7 to go. Then my horrible clumsiness struck, a style of baking I call 'Disaster Baking'.  Cheap bamboo tongs aren't advised to pull hot, oily metal tubes out of a pot of extremely hot frying oil. I learned this the hard way, after decently burning myself on the wrist. Damn it hurt!

IMG_5798

The fun burn took my focus away from the cannoli project, and brought it to how in retrospect, I should have gone about the project differently. Too late! But I still finished the challenge, making a basic ricotta filling. I was originally going to make a savory Mexican chickpea filling, topping it will cheddar cheese, but that was nixed.

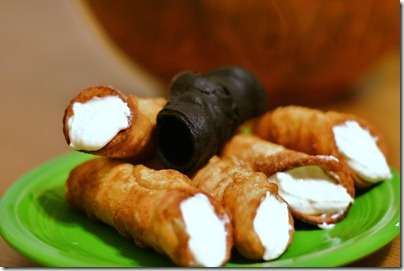
I would have to say, I am currently underwhelmed by cannoli. For the effort, I don't think the are worth it. I think many other desserts are better, and easier to execute without such pain. I might try it again in the distant future, who knows.   And do you notice the different looking canola? It was neglected in the hot oil as I held my hand under cold water until hubby got home to fix the problem I had gotten myself into.

IMG_5805

Friday, October 30, 2009

Mmm, Pumpkin Whoopie Pies

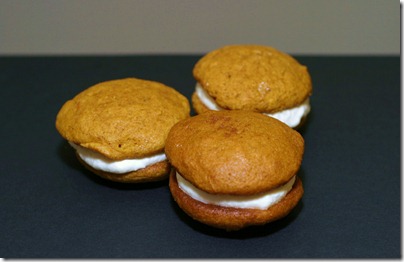
Everyone else is super excited about pumpkin. It wouldn’t be my first choice of flavors, but it definitely is growing on me. Especially in these whoopie pies. The creamy filling accents the pumpkin so well, yummy! And the cookies were a lot easier to make than I anticipated.

IMG_5743

Pumpkin Whoopie Pies from Cook's Illustrated

Ingredients

Cookies

1 (15-ounce) can pumpkin puree
large eggs
3/4 cup vegetable oil
2 cups granulated sugar
2 teaspoons vanilla extract
2 teaspoons ground cinnamon
1/2 teaspoon fresh ground nutmeg
4 cups all-purpose flour
4 teaspoons baking powder
2 teaspoons baking soda
1 teaspoon table salt

Filling

8 tablespoons unsalted butter (1 stick), softened but still cool
4 ounces cream cheese (1/2 package), at room temperature
3/4 cup Marshmallow Fluff (3 1/2 ounces)
1/4 teaspoon table salt
1 teaspoon vanilla extract
1 1/4 cups confectioners' sugar , sifted

Instructions
  1. For the cookies: Adjust oven racks to upper-middle and lower-middle position and heat oven to 375 degrees. Line 2 large (18 by 12-inch) baking sheets with parchment paper.

  2. Stir pumpkin, eggs, oil, sugar, vanilla, cinnamon, and nutmeg together in large bowl until well blended. Whisk flour, baking powder, baking soda, and salt together in medium bowl. Stir dry ingredients into pumpkin mixture until well incorporated.

  3. Using small ice cream scoop (#30 is the perfect size) or tablespoon measure, drop 2 tablespoons of dough on prepared baking sheet. (You should fit nine scoops of dough on each sheet.) Spread dough into 2-inch rounds about 1/2 inch thick and spaced 2 inches apart. Bake until cookies are just set and bottoms are lightly browned, 10 to 14 minutes, rotating baking sheets from front to back and top to bottom halfway through baking. Slide cookies, still on parchment, to cooling racks. Cool baking sheets, line with fresh parchment paper, and repeat with remaining dough.

  4. For the filling: With electric mixer, beat butter and cream cheese at medium speed until no lumps remain, about 30 seconds. Scrape down sides of bowl with rubber spatula. Add Marshmallow Fluff and beat at medium speed until incorporated, about 60 seconds. Beat in salt and vanilla until well blended, about 30 seconds. Scrape down bowl. Reduce speed to low and gradually add confectioners’ sugar, beating until smooth, about 1 minute.

  5. Spread 2 tablespoons filling on center of flat side of one cookie. Place flat side of second cookie on filling and press cookies together to bring filling to edges. Repeat with remaining cookies and filling. (Cookies can be refrigerated in airtight container for up to 4 days)

Note: I used a scoop smaller than a #30, which still provided a good size cookie. If you use a smaller scoop, consider cutting the cookie portion of the recipe in half.

Happy Halloween!

Bake at 350

Wednesday, October 28, 2009

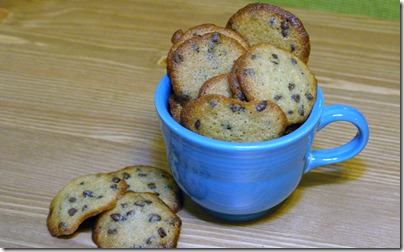
Neighborly Mini Chip Cookies

Apparently, older adults, say the age of grandparents, are coming out of the woodwork lately, wanting to be friendly with me. I will be at the grocery store looking at produce, and I get chatted up about those pre-wrapped baking potatoes. More than once, I have been mowing the yard, minding my business on a weekday morning, and I get stopped by one neighbor or another, and we start talking about how I enjoy the new neighborhood, how I actually am employed regardless of the ability to mow the yard on a weekday morning, and about any neighborhood gossip my new friends might have.

I don't think twice about these small encounters, until a neighbor
calls me at the bakery, asking me over for dinner. At this time, I
had only met the neighbor once, and hubby hadn't. As we were thinking about this dinner invitation, we had no idea what to expect. When you go into a new situation, what better than bring a sweet, to help the evening go smoothly? And this gives us Neighborly Mini Chip Cookies!

IMG_5734

Neighborly Mini Chip Cookies adapted from epicurious
Yields about 85 cookies

10 Tbsp Butter, unsalted, softened
2/3 cup light brown sugar, packed
1 large egg
1 tsp vanilla extract
1 cup flour, all-purpose unbleached
1/2 tsp baking soda
3/4 tsp salt
1 1/2 cup mini chocolate chips

I used Enjoy Life semi-sweet vegan chips, which are awesome, but use whatever you have.

Preheat oven to 400 F. Line two baking sheets with parchment paper, and adjust oven racks to upper-middle and lower-middle positions.

Beat butter, sugar, salt and baking soda together in standing mixer until fluffy. Scrape sides, then add egg and vanilla. Scrape sides, then add flour gradually. Mix until incorporated.

Fold in mini chocolate chips.

Using a teaspoon measure, drop dough onto prepped baking sheets. (I fit about 25 cookies per sheet)

Bake 6-7 minutes, rotating sheets from top to bottom, front to back, halfway through cooking time. Place on cooling rack in pan for 5 minutes, then removing cookies from sheet to continue cooling.

If you are feeling neighborly, take a handful over to a neighbor, I am sure they will welcome the treat! The hubby thinks these are the best cookies I have made in a long time. I take that as a huge compliment coming from a guy who is totally not a sweets fan.

Thursday, October 22, 2009

Pumpkins and Lobsters!

Halloween. I've never been into costumes, mainly because I am not creative enough to think up an amazing costume idea.  But I do love other things associated with Halloween, like dressing our adorable pug up in silly costumes, showing off our costumed dog, and baking awesome treats!

IMG_5737

Since we now live further away from both families, I wanted to get
together some care packages in put in the mail. What better than super cute pumpkins?

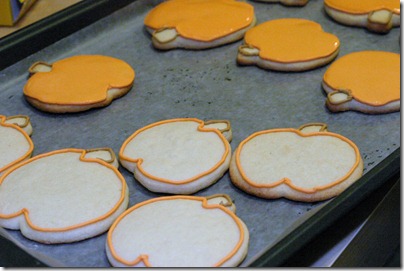
IMG_5725

I used Americolor food color gels in the royal icing, which I am now obsessed with.

For the faces, I tried out new Wilton food color pens. I had never
used them before, but they were perfect for the little pumpkin faces! I let the royal icing on the cookies dry overnight, then they were all ready to be drawn on. These pens worked so well I will have to find more cookie excuses to use the pens!

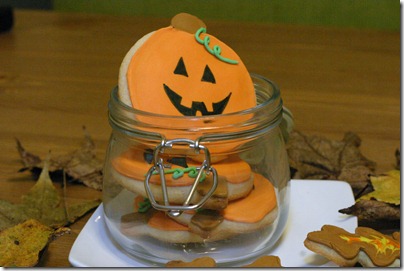
IMG_5729

Look how cute these little pumpkins look as they found their way into a little jar, ready jump in a box and mail out. Some even made it to hubby's work, along with some Neighborly Mini Chip cookies, which I will tell you more about later!

IMG_5738

Monday, October 5, 2009

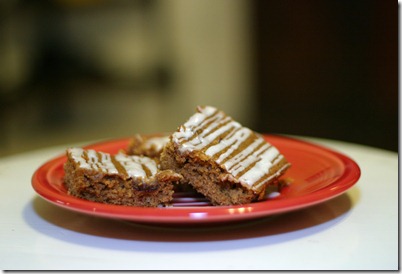
Apple Butter Bars

I love getting mail. I am almost obsessed with it, especially packages. So when adozeneggs mentioned the Fall Foodie Swap, my eyes lit up.  I had a whole month to pull together a package for my swap partner, then I would mail it, and wait in anticipation for my surprise to come!

Between signing up for the swap and the send-off date, life got busy for us.  Hubby was offered a job in a new city, and all of a sudden, we were packing up and moving. As the end of the month neared, I gathered some little surprises and sent them off.

I was thrilled when my package arrived from Lanie. Full of great surprises, including some awesome Ohio Apple Butter.  Included in the package was a recipe for Apple Butter Bars, which I knew I had to try.

IMG_5718

We didn’t have raisins around the house, nor do I care much for them, so I substituted 1/2 cup craisins.

Also, instead of apple pie spice, I utilized my spice rack to make up a mock apple pie spice.

Apple Pie Spice:

1 tbsp ground cinnamon
1/4 tbsp ground allspice
1/2 tsp ground nutmeg
1/2 tsp ground ginger
pinch of ground cardamom

Recipe for Apple Butter Bars

Ingredients
1/2 cup butter, unsalted, softened
1 1/2 cup all-purpose flour
1/2 cup brown sugar, packed
1/4 cup granulated sugar
1 egg
3/4 cup apple butter
1/2 tsp baking soda
1/2 tsp apple pie spice mixture
1/2 cup craisins
1 cup confectioner's sugar
1/4 tsp vanilla extract
2 tbsp milk

  1. Preheat oven to 350° and grease 13x9” baking pan.
  2. Cream butter in the bowl of a standing mixer with paddle attachment.  Add 3/4 cup flour, brown and granulated sugars, egg, apple butter, baking soda and apple pie spice.  Beat together until well blended.
  3. Bake for 20-25 minutes or until toothpick in center comes out clean. Cool in pan on wire rack.
  4. For icing, mix confectioner’s sugar, vanilla, and 1-2 tbsp milk together.  Mix to drizzling consistency, add milk as needed.
  5. Drizzle icing over cooled bars. Cut and serve.